So you want to know about Robin?

My photo
Hi All! A little about myself, I'm a 27 year old living in Jersey with my hubby and our 75 lb fur-child, Gunner. I recently landed my dream job as a Speech Language Pathologist in a huge acute-care hospital in our area and I couldn't be happier! In addition to my "day-job", I moonlight as a crazed crafter, lol. I have been a lover of anything "crafty" for as long as I can remember but didn't have time to actually ENJOY the crafts I was making until I finished up with my masters degree. Now, I'm done and have some more time available to create things that I love. Hope you enjoy!

Saturday, January 8, 2011

The Main Event! {Baby Shower}


So today was the day!  And everything was great even with the oh-so-fabulous 5 inches of snow mother nature dumped on us.  


Big shout out to Kel's mom for lending us her Jeep or it would have been.... let's just say, interesting.... trying to get to the shower.  

Ok so onto the details.... We teamed up with Er's mom and decided on having the shower at Carrabba's Italian Grill.  It was perfect because they don't open to the public until 3, so we had a nice little 12 o'clock lunchtime kick-off :)   Erin and Jay decided against finding out the sex of their baby, but they did pick an adorable green/yellow/brown Monkey theme for their nursery and everything else that goes with a baby.  Once we knew the color scheme, Kelly and I were off.  We wanted to have fun yet make the decorations as functional as possible.  

Oh you want to know about the details??  Well here they are!  

A few months ago, I was wandering a craft fair with my mom and stumbled across these adorable little rosebuds make from socks!  As I am with pretty much everything else, I was dead-set on making them myself.  I bought two different sized socks and got to work.  
Secondly, we wanted to make a diaper cake.  Not only are they a really cute way to give someone diapers, but they also make an amazing centerpiece!  I apologize, because we made the diaper cake at Kelly's house and I totally forgot to bring my camera, so I don't personally have picture documentation of a "how-to", but I PROMISE I will steal Kelly's pictures and attempt a how-to post!  Here are a few pictures of the final diaper cake.  Erin's cousin made the edible cake that you see in the picture... It came all they way from CT and was soooooooo delicious!


Lastly, we made the favors for all the guests to take home.  This was a joint effort... Kelly initially came up with the "Poppy" nickname, I came up with the idea of doing some sort of lolli-POP, and Er's mom suggested doing a yummy brownie-pop!  And that's how the Brownie-POP was born!  (we used a Land O'Lakes recipe)

Here are a few pictures of how they turned out.  We chose to use them as centerpieces on the tables... we bought lime green and grass green chinese take-out boxes, pushed the flaps inside, stuck a piece of floral styrofoam in them, stabbed the brownie-pops in the foam and covered the foam with some decorative tan grassy/moss stuff.  (I'm a really good describer right?!)  Let me be the first to tell you that they were delicious... Kelly and I had a few brownie-pop casualties that we couldn't just WASTE, so we ate them.... and loved every second of it :)  

Here are the tags I made for the favors.  They were VERY simple, I used Microsoft Word,  pirated the pictures from www.babysupermall.com (they are Poppy's bedding), and printed them on cute tan polka dotted cardstock.  Donzo.  


I dare you to tell me you wouldn't gobble these up.... actually, make that a
DOUBLE DOG dare :)


Lastly, (and this isn't really a craft, it's just super cute), we bought pretty much any clothing with a monkey on it and put it all on a clothes line and hung it up as decoration.  


Ta-Da!!  Sometimes I wonder why I spent 6+ years getting a Masters degree when I could just party plan and decorate my life away.... lol.... wishful thinking!!

And just for fun, here are some random pictures from the shower and the after party :)
Getting ready to open presents!


Sweet Jesus, where is all of that going to go?!

Best Friends :)


Poppy's Nursery 

NONE of these were given to Erin for the baby.... they all belonged to her or Jay already :)


<3 Robin

Monday, January 3, 2011

Happy New Year!!

Being that it's the new year, it's only right for me to declare to the world some of my new year's resolutions :)  Like most, it's sometimes hard for me to keep my resolutions, but this year, I want to make some attainable goals!

Firstly, I am going to be more active... I joined an indoor soccer team a little over a month ago and it's been great (don't get me wrong, I almost passed out/died during my first game, but each game gets easier and it feels great to be playing again!)

I am going to cook more... this goes along with the whole be more active thing... what's the point of being more active if you're not eating healthy?!

I am going to MASTER my new camera (Cannon Rebel EOS) that my hubs got me for Christmas.  Gone are the days that I only learn how to use certain feature and leave the rest of whatever electronic it may be unused.

I WILL STOP BITING MY NAILS!!!!!!  Dammit, I am 27 years old, let's kick this bad habit for good!!!

I will read more books; this will be the first full year since 2002 that I have not been bound to undergrad or grad school books.  I LOVE reading, so bring on your recommendations!

Lastly, I'm going to spend more time with my amazing husband.  And I mean REAL time, not watching TV time, or I'm reading while he's on the computer time. I'm talking, going on dates, walks, trips AWAY from technology.

Anyone else have a resolution list?

Sunday, January 2, 2011

Poppy

It is less than 1 week until my friend Erin's baby shower!  My friend Kelly and I are helping her mom plan it and I've been taking pictures the entire way so I can have one amazing blog post after her shower comes!  

Oh and to fill you in about the "poppy" title, that's what we've deemed her unborn child since we don't know if it's a boy or girl :)

To say that I'm excited is an understatement... and I don't even get to open any presents!  I'm simply excited to see one of my best friends have a great time with close friends and family :)  

Stay tuned for pics of decorations, favors and fun :)

Sunday, December 26, 2010

A Christmas Gift

Shortly after I posted From Tragedy to Treasure, my friend from LaSalle, Christine, asked me if I would make her a T-shirt blanket for her to give to her parents for Christmas.  She said she wanted to make a memory blanket from her brother's old t-shirts.  Her brother passed away at the very young age of 23 from cancer, in 2007.  She knew that having a personal blanket would be the perfect way for her, and her parents, to keep her brother's spirit around on a daily basis.


As I sorted through his t-shirts, it was easy to see that he was a die-hard Penn State fan... from his Penn-State football gear, to his fraternity garb... It was also easy to see that he had an awesome sense of humor, as evidenced by a t-shirt of a man in sleeveless shirt and tie with grizzly bear arms and the caption "2nd Amendment"  


I'm super happy with how the blanket came out, and it meant even more when I got a a heartfelt text from Christine telling me that her parents absolutely loved it.  Not only do I love making crafts, but I love the reactions even more :)


I attempted to take as many pictures as I could remember while making this blanket (but sometimes, I forget because I was so enamored with my new sewing machine!), because I've gotten a few requests on "how-to" make a blanket.  So here it is :)


I wanted to keep things as symmetrical as possible for this blanket, so I cut all of the squares to the same dimensions.  This part is totally subjective, but I found that the easiest way is to measure the biggest design you have on a t-shirt and base the rest of the t-shirts on that measurement. 

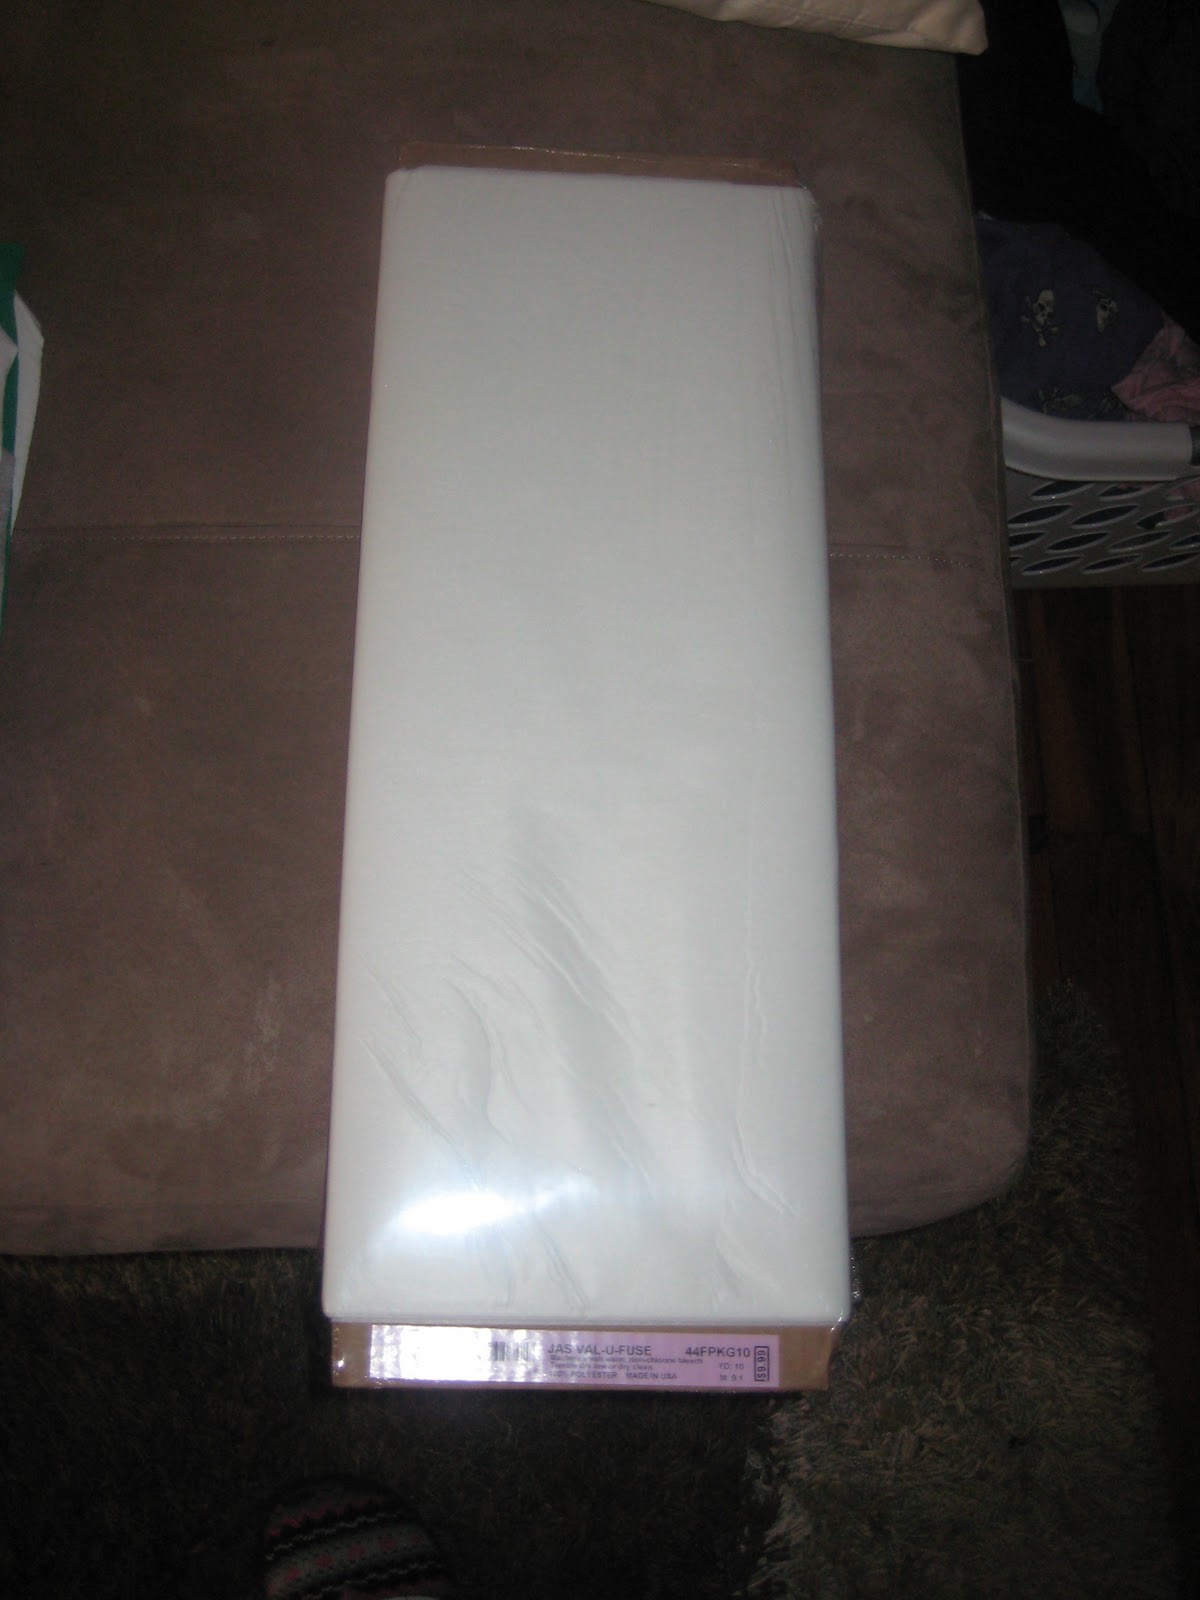
This is the coveted interfacing, it's the stuff that you iron on the back of the t-shirts to temporarily take the stretch away.  Therefore making sewing easier!

This is the particular interfacing that I use for t-shirt blankets, it's fairly thin, so it doesn't make the t-shirts too stiff.  You can buy it by the yard, or on the cardboard thing, like I did.  These things ALWAYS go on sale... I got this whole thing (10 yards!!) for TWO DOLLARS on black Friday

There are two sides to interfacing... the side with the dots has a bumpy feeling to it, THAT'S the side that you iron against the fabric.  If you do it backwards, you will get glue all over your iron.... I only know that because I may have done it myself once (ok twice!)... whoops! 
Look Ma!  No Hands!  To iron the interfacing on, lay the fabric with the patterned side down (like it should be facing the ironing board), then place the interfacing (bumpy side DOWN) on the fabric).  then slowly move the iron around.  You'll know when it's done because you won't be able to peel it off of the fabric.  

See!  It also changes colors too... the middle is done, outsides still have to be ironed

Then figure out what pattern you want to use (please ignore the sloppy t-shirt on the bottom row, I temporarily lost it and realized it when it was missing from my design)
MISSING PICTURE ALERT!  I got excited with my sewing machine and neglected to take pictures when I was sewing the rows together.  My approach is to sew a horizontal row together.  Then sew the next horizontal row together and then sew those two rows together.  I use a 1/2 inch seam.  so in a nut-shell, that means:  take two t-shirts, match up the seams (patterns facing in together)... then sew a straight line 1/2 inch from the edge of the shirts.  

This is after 2 horizontal rows have been sewn together.  this (and the pictures below) is the part where they are attached.   I match up the seams and then pin the hell out of them, so it rows don't slide when I'm sewing.  

Almost ready to sew!  
Repeat the above steps as many times as you need to until the front of your blanket is together.  


This is how I know if I'm going in a straight line.  I just keep my sewing over the line that indicates 4/8
OK, TONS of missing picture alerts... I was so caught up with sewing, that I TOTALLY forgot to take pictures of how I did the trim.  Essentially, I cut skinny strips that matched up to the width of the squares and sewed them all on.  For the back, I cut blocks to the same dimensions of the front squares and sewed them together the exact same way as I did for the front (minus the interfacing because I didn't use a stretchy fabric)

So here is the final product!! I decided to use a navy blue and grey for the trim because of all the Penn State t-shirts :)


Well, that's it!  Hope you all love it as much as I do :)


<3 Robin

Corn Pillows

Hi all!  As promised, here are some of the posts that I couldn't reveal before Christmas :)  Last year, my friend Kaitlyn gave me a "corn pillow" for Christmas... now while my orignial has since been eaten by the lovely Gunner-man, I have made more than one in it's place.

What's that you say?  What the heck is a corn pillow?  Well, a corn pillow is simply the best :)  It's  pretty much exactly what it sounds like... a pillow filled with corn (corn feed: the whole kernel kind).  It's amazing because you pop it in the microwave for 3 minutes and it gets nice and hot... and it holds the heat for a long time!  So it's perfect for snowy-days, for your cold ride to work in the morning or to throw under the covers at the foot of your bed (I'll stop now because I know I'm sounding very infomercial-like :) ), but for real, it's that awesome!

So for any of you who want to make a very inexpensive (a 50 lb bag of corn feed costs no more than $10 and a yard of fabric is about $4) but very functional and amazing gift for someone, here's a little "how-to"

First step would be to go to a fabric store and buy flannel-type fabric.  I use fabric called something like "snuggle flannel".

Measure big squares.... around 10 x 24 inches.


 This is roughly the size you want once the fabric is folded in half.
Then fold it together so the patterned side of the fabric is on the inside.
 Sew around 3 and 3/4 sides of the fabric
 Pull the pillow right-side out... you should have about 2-3 inches open still.
 Then get your corn ready.  The easiest way to fill the pillow is get a wide mouthed funnel.  If you don't have that, the next best thing is to cut the top of a 2-liter bottle of soda.  You can use that as a funnel.
 Fill the pillow so it's about half-way full.  If you fill it up any more than that, it won't hold the heat as well.
 Then pick a "fancy" stitch and sew up that 2-3 inch opening.
and here is your finished corn-pillow!

Make up a cute little tag that says to microwave for 3 minutes and you're done.  Also, for anyone who lives in a hot area, these pillows can also be put in the freezer and they stay nice and cold for a long time too!


Oh.... important side-note:  The first few times you microwave these corn pillows, they will feel damp.  That's just the corn releasing some remaining moisture.  That feeling will go away after a few trips to the microwave :)

Enjoy!

Friday, December 24, 2010

Slacker

I know, I know, I've totally been off my game.  Go ahead, call me a slacker, lol.  I PROMISE I have goodies coming!  Let's just say that I can't reveal a few things until after... let's say December 25th :)

Until then, Have a very Merry Christmas!!

<3 Robin

Monday, November 29, 2010

Knot Dress

Ok all... the good news is that I successfully constructed a knot dress! The bad news is that there needs to be definite changes for the next one that I make.  And I apologize, because I was so caught up in actually making the dress, I sporadically took pictures.  So here's what I have.

This is the color palette I originally chose... the brown ended up getting axed.  {I also apologize for the color in the pictures... everything looks brighter than it really does in person}


 I cut 2 pieces of fabric 5x9 inches. This is going to be the front and back of the bodice.  Then I measured in and down 2 inches.  This allows for the armholes.
 Then I got fancy (lol) and added some turquoise trim so I wouldn't have to figure out how to hem a curved line.... (shhhh don't tell anyone that I'm lazy!)

From here, I put the two pieces of fabric together (right side facing eachother) and sewed one side together.


 Then, I tempted fate and tried to make pleats... Thankfully it worked!  I made them by leaving a 2 inch gap, then I picked up the fabric right above the 17 and folded it over to the 15.
 Then it looks like this :)  (please ignore the switch in #s, like I said, I was really bad about taking pictures this time!)
Ok, again with the switch-a-roo with pictures.  So here is where I attached the top to the bottom.  I placed the right side of the fabrics together and sewed one big straight line.


Then I went to sleep and finished the rest today and totally forgot to take ANY pictures until it was done.  In between, I added straps and a hem and buttonholes!  Here it is!!


The dress could be worn either way, with the knots in the front or the back :)


So it should be interesting when I give this to Chris' cousin... I have no idea if it's going to fit her (this is supposed to be a 6 month size) or if it will even make it through the washer... I'm going to give that a test run tonight.  

Things I learned:
 - this may need a zipper
 - I love making dresses
 - I need to take my time and pay attention to where seams are going to show up.

Hope you enjoyed!