So you want to know about Robin?

My photo
Hi All! A little about myself, I'm a 27 year old living in Jersey with my hubby and our 75 lb fur-child, Gunner. I recently landed my dream job as a Speech Language Pathologist in a huge acute-care hospital in our area and I couldn't be happier! In addition to my "day-job", I moonlight as a crazed crafter, lol. I have been a lover of anything "crafty" for as long as I can remember but didn't have time to actually ENJOY the crafts I was making until I finished up with my masters degree. Now, I'm done and have some more time available to create things that I love. Hope you enjoy!

Monday, October 25, 2010

Dresses!!

ok so I'm going to admit it, I'm a big copycat :)  I see something and then I try to make it.  Like this lovely little pillowcase dress...I saw it at the Pitman craft show and was dead set on making my own... I think I did pretty good!


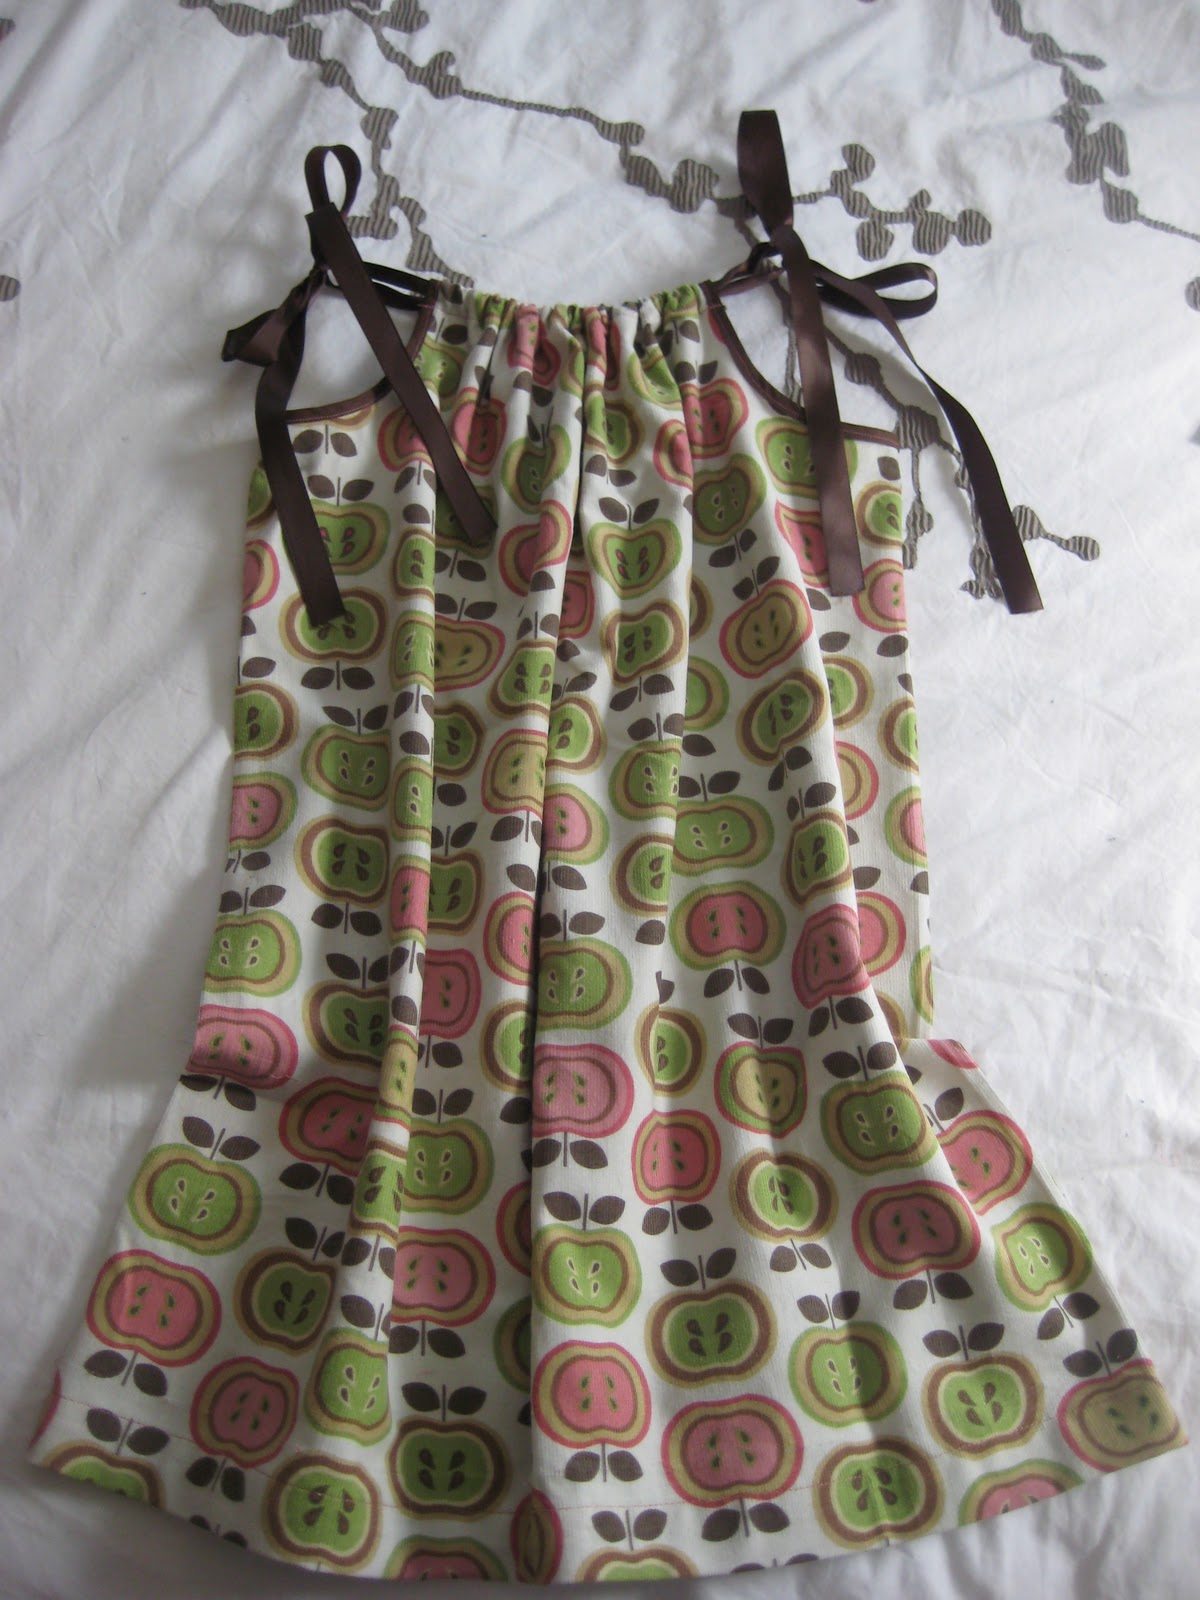
It was actually WAY easier than I thought it was going to be.  You can make the dress out of actual pillowcases (hence the name), but I chose to use some really soft corduroy from Joann Fabrics.  and I even used casing for the armholes, which I previously never even knew existed, but let me tell you, it's a miracle worker.  (For those of you who are like I was, the casing is the brown trim-looking stuff that lines the armholes.... it allows you to put an end to the fabric without having to hem it, because hemming on a curve is NOT something I want to deal with)

And again with the copying (I know, I know, get some original ideas Robin)... my friend Melissa got this ADORABLE knot dress to take her daughter's 2nd birthday pictures in... and yet again, I HAVE to know how to make this!

The dress sort of looks like this one (picture courtesy of http://www.youcanmakethis.com/info/featured-products/Forget-Me-Knot-Dress-Sizes-12mth-5.htm)

Except I'm going to make it with all types of delicious fall patterns and fabrics (mixture of corduroy and cotton).  This is the palette I think I'm going to try :)

I dare you to tell me you don't love owls and apples?!?!


Thursday, October 21, 2010

A "put-in-your-mouth-and-immediately-faint-because-they are so good" cookie bar recipe

Ok, I'll admit it.  I can't take credit for this recipe, I got it from the amazing MaryBeth :)  But it is just tooooo good to keep a secret, so here it is Blogger World!

This is the EASIEST recipe EVER

First, get all of your ingredients together... this should include a box of brownie mix (and the ingredients you need to make that) and a bag of chocolate chip cookie mix(+those ingredients) or a tube of cookie dough if you really want to make it easy and some hot fudge.

My particular boxes needed these ingredients:


From there, mix your brownie mix and cookie mix:

Grease a baking pan and pour about 3/4 of the brownie batter in the pan, then drop chunks of the cookie dough allll over the brownie batter.  From there, pour some hot fudge over top (in a fancy design if you'd like) and then pour the rest of the brownie batter over top.

Looks like this:

Pop it in the oven at 350 for about 45 mins or until toothpick comes out clean (I used an 8x8 pan, so if you use the long rectangle pan, time will be less)

and shazam!  Final product!

*WARNING*  For your own good, please be sitting down for the first few bites, because you will become overwhelmed by the deliciousness you are putting in your mouth.

Consider yourself warned ;)

Wednesday, October 20, 2010

Pumpkins, Pinecones and Pizazz, Oh My!

So I actually completed this project about 2 years ago when my bestie, Melissa, was preggo, stuck at home and obsessed with watching Martha Stewart.  I was over one day hanging out when she said, you've got to see this project!  So I watched and instantly wanted one.

M.S (Martha) had picked some pumpkins, covered them with glue, and then covered them with REALLY fine glitter.  I just HAD to have them!

Literally, I went out as soon as I got home and bought fake pumpkins (helllooooo, they last forever versus one season!)  I then went on a hunt to find fine glitter... I can't remember exactly or find the box that I have the glitter it, but I am 99% positive that I used the same glitter that Martha did.  

I got to work glittering my pumpkins and they were done drying in a few hours.  So I put them on a tray and then added some scented pine cones/nuts/other random things that I got from Ross.

Aren't they just b-e-a-utiful?


Tuesday, October 19, 2010

Adventures (or lack thereof) at the Dog Park

So yesterday I decided to take the Gunner man to a dog park near my house.  This particular dog park has two pens, one for the small dogs and one for the "big" dogs.  Now, the sign outside of the "big" dog pen says "For dogs over 30 lbs".  I don't know about you, but I do not consider 30 lbs to be a big dog... in fact, Google agrees with me... they define a big dog to be OVER 50 LBS! which Gunner fits right in with his fabulous 75lb figure :)

Anyway, I digress, there were no dogs in the big dog pen, but there were lots of dogs in the little dog pen (some of which were DEF over 30 lbs, but I'm not the dog park police...) All I was looking for were playmates for Gunner... so I brought him up to the little dog pen gate just to say hi to the little dogs... wellllllll their owners were shooting me some devil looks, like I was really going to bring my pooch in with their little wee ones and he was going to turn into Cujo.

Now, I ask you, who would be scared of this face???


Now if he was making this face, maybe I would understand
My dog is not an attractive sleeper


Just kidding, remember Gunner as this:
Don't you agree that he could get away with murder with a face like this?!

Sunday, October 17, 2010

From Tragedy to Treasure

About 10 days ago, my friend Alicia (see Ramblings: A Compilation), asked me to make her a t-shirt blanket for her mom's birthday.  I said sure, and then she told me that she wanted to me to make the blanket out of her dad's old clothes...  Alicia's dad passed away last year in a car accident the day after Thanksgiving.  Since that horrible day, their family (along with friends, coworkers and really anyone who had ever met Mr. A) has dealt with the grief one day at a time.  


Alicia thought that making her mom a blanket out of her hubby's (of 30 years!!) clothes was the perfect way to create a keepsake that would last her for years and years to come.  So Alicia and I got to work.  I helped her go through his clothes to pick out pieces that would best represent him.  It was nice hearing the many stories that were attached to each piece of clothing.... from the many Jimmy Buffett shirts to the bathing suits that he lived in, to the PINK shorts that he swoooooore were RED, to the crazy ties. :)


So here's a little "how to" section of the blanket making.  


This is what I started with... 

From there, I cut out a cardboard square as a template in attempts to keep all of the squares the same size.  


That idea quickly went out the window because the designs on Mr. A's shirts were all different sizes and I didn't want to leave anything out!  So I just started to "wing it".  

Then comes the interfacing.  I learned how to use it when I made Alison's baby clothes blanket and it is a miracle!  There are two types of interfacing... the iron-on kind and the sew-in kind.  I'm all about easy, so iron-on, here we go!  Interfacing makes it easier to sew stretchy material... it temporarily gives the t-shirt (or whatever other stretchy material you're sewing) some stability.  Then once washed, it eases back up into its original comfy state. :)  


Step 1: put the fabric face down

Step 2: put the interfacing on the back of the fabric so the "bumpy" soon-to-be sticky side is against the fabric.  


Step 3: put something over the interfacing so the iron doesn't burn it... I used a flannel-y fabric

Step 4: Spritz the cover fabric with some water and then iron it!

Do that to every square that's stretchy... it takes time, but you will LOVE yourself for doing it when you're sewing all of your squares together and they are all staying where they are supposed to, not bunching all up to create bizarro ripples.


Then I fiddled with all of the squares until I found a pattern that worked and I sewed it all together :)

Then I cut strips for the trim and sewed those on...  
 cut out big squares to sew together for the back..


Lastly, you make a sandwich with three layers: the front, middle layer of batting, and the back!  Sew it all together like a pillow, pull it ride side out and TA DA!!  you have a finished blanket :) 


Alicia gave her mom the blanket last night and rumor has it that Mrs. A loved it!

Wednesday, October 13, 2010

A Compilation

So, let me take you guys back to the beginning of my blanket making frenzy.  My friend Kaitlyn's sister was pregnant and Kaitlyn (also a crafty person) decided that she was going to try her hand at blanket making.  She pulled out all of these adorable fabric swatches and I was hooked.

Things ran through my head like, I could totally do this!!  Who can I make blankets for?! At the time, Chris' cousin was also pregnant... viola.  Done and Done.  A few weeks later I had this.


Not too shabby for my first attempt, right?!

And then they just kept on coming.
My friend Alicia had a baby boy and that resulted in this for baby Ben


and of course I couldn't leave out big sister, Madison, so I made her this one :)


And there you have it fellow bloggers, some of my past projects :)

Tuesday, October 12, 2010

An Experiment

So a few months ago a friend from high school approached me to make a quilt for her.  She was getting ready to move into a new home and wanted a blanket made from all of her son's "1sts and favorite" clothing... first halloween outfit, first christmas pj's, first bib, favorite t-shirts, etc. to hang on her wall.  Now, while I've made some blankets before, I had never taken on anything quite this intricate.  And on top of it, the material I was working with housed some seriously special memories (no pressure there!)


So off I went.  I cut up all of his clothes, learned how to use interfacing (more on that in a different post), laid out a pattern and sewed it all together.


Here is the end result!  I was super happy with it and her reaction definitely made the experiment worth it :)


Here are some of my favorite sections


And of course, it had to be delivered in a nice presentation ;)


So I need to send a big *Thank You* out to Alison for trusting me enough with some very special articles of clothing!


Until next time...